[Top 15] Rainbow 6 Siege Best Mouse Settings That Give You an Advantage
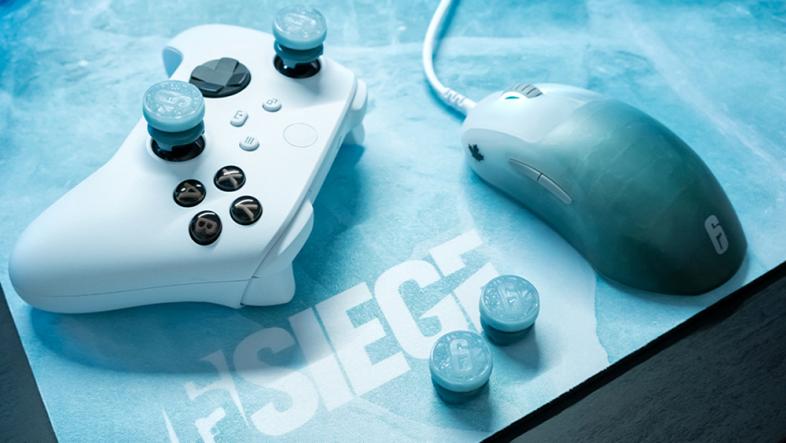
It goes without saying that aim is an integral part of Siege. Probably the most important aspect of it actually. And aim is directly affected by your mouse settings. So, in this article, we’re gonna talk about the best mouse settings and their nuances.
15. Raw input - Mouse/Keyboard - Off

The in-game description says turning it on will improve reactivity. Don’t trust it, because in this author’s experience as well as many others’ this feature is quite buggy.
Advantage:
- Avoids raw input bugs
- Off is enough for you to win games, there’s really no noticeable improvements even if you turn it on
How to apply:
- From the main menu, click the gear icon on the top right of the screen
- Go to Controls
- Under Controls, the first setting is Raw Input- Mouse/Keyboard
- Turn it off
14. Look inversion – Disabled

Just like its name states, with this setting on, when you’re trying to look up normally, you will look down, when you’re trying to look right, you will look left. It's an inversion of your aim, and be careful not to accidentally enable it.
Advantage:
- You’ll be able to aim normally like the rest of us
How to apply:
- From the main menu, click the gear icon on the top right of the screen
- Go to Controls
- Scroll down and go to Mouse Look Inversion
- Keep it Disabled
13. Mouse Scroll – Disabled

Turning this setting on will enable you to switch weapons using mouse scroll. However, if it’s on, it’s guaranteed that there will be a lot of times that instead of using your operator’s special gadget, you’ll be switching weapons instead, because clicking the mouse scroll is also the button for special gadgets.
Advantage:
- Avoids accidentally switching weapons while trying to activate special gadget
How to apply:
- From the main menu, click the gear icon on the top right of the screen
- Go to Controls
- Scroll down and go to Mouse Scroll
- Disable it
12. Aim – Hold

With hold, you’ll only be aiming while you’re pressing down the mouse right click. This is better for mobility, flick shots, and quickly switching targets.
Advantage:
- Faster aiming
- Flick shots
How to apply:
- From the main menu, click the gear icon on the top right of the screen
- Go to Controls
- Scroll down and go to Aim
- Put it on Hold
11. Mouse sensitivity – Horizontal

This is your sensitivity when aiming left and right. Mouse sensitivity really varies per player. Some pros use very high values, like 90, but there are also pros who use very low values such as 4. This is a setting that should be determined only by you. Pick a value and test it out in the training grounds if it feels right.
Advantage:
- Deciding your own sensitivity means you’re choosing the best one for your own playstyle
- If you decide your own sensitivity, you won’t feel awkward when aiming. Because it’s your own.
How to apply:
- From the main menu, click the gear icon on the top right of the screen
- Go to Controls
- Scroll down and go to Mouse Sensitivity Horizontal
- Pick the value that feels best for you
10. Mouse sensitivity – Vertical

This is your sensitivity when aiming up and down. Just like horizontal sensitivity, it’s best to pick the value that feels best for your own aim. Generally, it’s advisable to keep vertical and horizontal values the same.
Advantage:
- No awkwardness when aiming
- Your gameplay will truly be your own
How to apply:
- From the main menu, click the gear icon on the top right of the screen
- Go to Controls
- Scroll down and go to Mouse Sensitivity Vertical
- Pick the value that feels best for you
9. Standard ADS Sensitivity

Now Ubisoft introduced some changes to selecting ADS sensitivity in Y5S3. Those who were lucky to have been playing before that season, had their horizontal and vertical sensitivity automatically adjusted for the advanced ADS sensitivity settings. But for those whose sensitivities weren’t automatically adjusted, Ubisoft posted a lot of math on how to compute it so you can adjust it on your own. But for those who don’t wanna go through all that, there is Standard ADS sensitivity setting which will make things simpler for you. One value for all ADS magnification. Choose the value that feels best for your aim.
Advantage:
- You won’t have to go through all the math equations Ubisoft posted
- Quick and easy
How to apply:
- From the main menu, click the gear icon on the top right of the screen
- Go to Controls
- Scroll down and click Mouse ADS Sensitivity
- Set it to Standard and pick the best value for you
8. 1.0x Magnification

Now this is from the advanced mouse ADS sensitivity settings. With the advanced setting, you can adjust each scope one by one. Mine was adjusted automatically to 22 from my 33 horizontal and vertical sensitivity settings. This is a neat and efficient option if you want more or less sensitivity when aiming with a 1.0x scope.
Advantage:
- You can customize it to what you feel is best to your aim
How to apply:
- From the main menu, click the gear icon on the top right of the screen
- Go to Controls
- Scroll down and click Mouse ADS Sensitivity
- Set it to Advanced
- Scroll down to 1.0x Magnification and pick the best value that feels right for you
7. 1.5x Magnification

35 was the value that was automatically given to my 1.5x magnification from my 33 horizontal and vertical sensitivity. But with this option, if I feel like it’s too sensitive, I can move the slider left and set it lower.
Advantage:
- Specific change. You can truly customize your sensitivity to your own unique one.
How to apply:
- From the main menu, click the gear icon on the top right of the screen
- Go to Controls
- Scroll down and click Mouse ADS Sensitivity
- Set it to Advanced
- Scroll down to 1.5x Magnification and pick the best value that feels right for you
6. 2.0x Magnification

2.0x is reaching marksman rifle territory, and it's neat that we can specifically change its sensitivity to fit our own game style.
Advantage:
- You can lower or increase the value specifically to this scope
How to apply:
- From the main menu, click the gear icon on the top right of the screen
- Go to Controls
- Scroll down and click Mouse ADS Sensitivity
- Set it to Advanced
- Scroll down to 2.0x Magnification and pick the best value that feels right for you
5. 2.5x Magnification

Ah, the 2.5x scope. It’s the beloved acog, and probably still the most popular scope in Siege. With this setting, you can truly maximize its potential by adjusting its specific sensitivity to fit your own grip.
Advantage:
- You can truly own your acog with this setting
How to apply:
- From the main menu, click the gear icon on the top right of the screen
- Go to Controls
- Scroll down and click Mouse ADS Sensitivity
- Set it to Advanced
- Scroll down to 2.5x Magnification and pick the best value that feels right for you
4. 3.0x Magnification

Now this is a true marksman rifle’s scope. For sniping, it is generally recommended to use low sensitivity.
Advantage:
- Lower sensitivity will lead to more accurate sniping
How to apply:
- From the main menu, click the gear icon on the top right of the screen
- Go to Controls
- Scroll down and click Mouse ADS Sensitivity
- Set it to Advanced
- Scroll down to 3.0x Magnification and pick the best value that feels right for you
3. Mouse Macro – Back Button
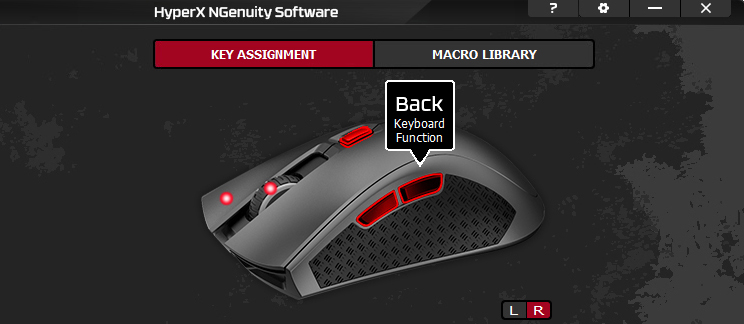
Take advantage of most modern mouse’s functions, like setting up macros. I personally set my Grenade button on the back mouse button that you see in the above image. This allows me to throw the Grenade easier and with more accuracy rather than just pressing G and aiming. I advise that you do the same.
Advantage:
- Easier hit the throw grenade button
- More accurate throws
How to apply:
- Open your gaming mouse’s driver
- Go to macros
- Change each button’s functions
2. Mouse Macro – Forward Button
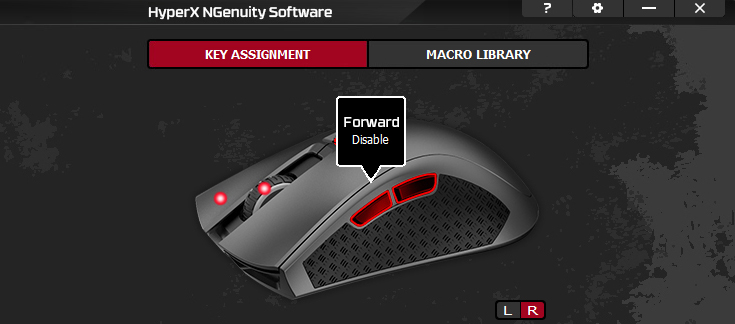
I personally have this disabled since my fingers are small and my thumb can’t reach that far honestly. But other players can benefit from this button by setting some functions to it like the Melee function for example:
Advantage:
- Easier and faster to melee opponents
- You won’t press C or B anymore instead of V when trying to melee enemies
How to apply:
- Open your gaming mouse’s driver
- Go to macros
- Change each button’s functions
1. Mouse Macro – DPI Button
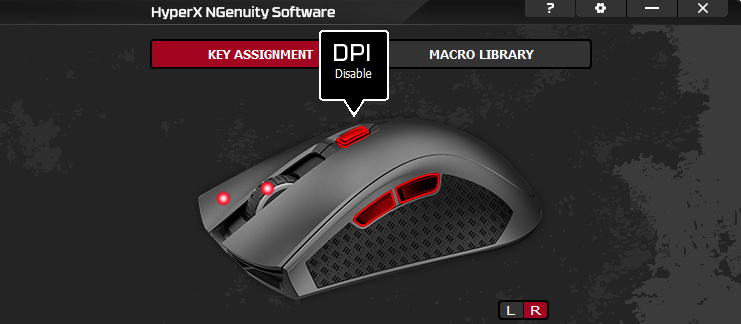
A lot of gaming mice have this button and seriously, once you’ve set your desired DPI, this button is pretty much useless. So might as well change its function and assign a nice Siege function to it like the Switch Ability Mode
Advantage:
- Will work great on operators like Capitao and Zofia
How to apply:
- Open your gaming mouse’s driver
- Go to macros
- Change each button’s functions
Attention operator, please be advised. There is a new directive from Six. Read up on these related articles, and prepare for deployment:
You May Also Be Interested In:
- Rainbow 6 Siege Tier List 2021 [Rainbow 6 Siege Best Operators]
- [Top 10] Rainbow 6 Siege Best Weapons
- [Top 7] Rainbow 6 Siege Best Attackers
- Rainbow 6 Siege Attachment Guide (R6 Best Attachments For Every Weapon)
- [Top 25] Best R6 Settings That Give You An Advantage
- [Top 15] Rainbow 6 Siege Best Graphic Settings
- Rainbow 6 Siege Best Weapon Attachments
- Rainbow 6 Siege Best Operators 2021
- [Top 7] Rainbow 6 Siege Best Defenders
- Rainbow 6 Siege Roles Explained And How To Play Each One
- [Top 10] Rainbow 6 Siege Best Players
- [Top 5] Rainbow 6 Siege Best Nomad Loadouts
- [Top 5] Rainbow 6 Siege Best Jackal Loadouts
- [Top 5] Rainbow 6 Siege Best Glaz Loadouts: From Worst to Best
- [Top 5] Rainbow 6 Siege Best Finka Loadouts
- [Top 5] Rainbow 6 Siege Best Lion Loadouts
- [Top 5] Rainbow 6 Siege Best Castle Loadouts
- [Top 5] Rainbow 6 Siege Best Dokkaebi Loadouts
- Log in or register to post comments
 Home
Home PC Game Trailers
 News
News Menu
Menu


